Food is one of the most popular things travel bloggers love to photograph. Aside from being good practice for honing photography techniques, taking pictures of the local fare gives them a way to preserve memories of the meals they had, deepening their appreciation of the rich flavours and culture of the destination. It also lets them connect with their audience because good food can bring joy and unite people.
However, travel bloggers must take high-quality photos of their meals and beverages to evoke powerful emotions. Through stunning photographs, it’s easier to showcase a dish or drink’s colours and textures—enough to make the audience imagine how the food tastes and smells.
You might think that you have to know the ins and outs of photography to take amazing photos of food for your travel blog. That said, following a few simple photography techniques can elevate your images. Let’s have a look at some of them.
Take a Photo of Your Food as Soon as It Arrives
Most types of food tend to look most appetising when freshly plated. In short, waiting too long to photograph them may result in wilted greens, melted ice cream, or congealed sauces. Timing is crucial when photographing food, so take your shots of the dish as soon as it’s served to preserve its freshness and appeal.
Use Natural Light as Much as Possible
Natural light provides a gentle illumination that enhances colours and textures, making food appear more natural and appetising. However, direct sunlight can be harsh and create strong shadows and highlights that may obscure details or create unflattering contrasts. That’s why, whenever possible, choose a table near a window or opt for outdoor seating with some shade to incorporate softer and more diffused natural daylight into your compositions.
Select a Narrow Lens
A narrow lens is ideal for capturing food photos. These lenses allow you to achieve a shallow depth of field, blurring the background while keeping your subject sharp and in focus. This draws attention to the details of the dish, such as garnishes or textures, while creating a pleasing bokeh effect that adds depth to your photos. You can purchase narrow lenses in various camera stores or you can also rent a couple to try things out before committing to adding them to your photography arsenal. Make sure to rent lenses UK-based photographers trust to ensure the quality of the gear.
Shoot in RAW
Shooting in RAW format offers significant advantages when photographing food for your travel blog. RAW files retain all the original data captured by your camera’s sensor, providing greater flexibility during post-processing. Unlike compressed JPEG files, which may lose details, RAW files allow you to adjust exposure, white balance, and other parameters without sacrificing image quality. This is particularly beneficial when dealing with challenging lighting conditions or when you want to enhance the colours and textures of your food photos. Although RAW files require more storage space and post-processing effort, the control and quality they offer are unmatched.
Consider Your Camera’s Orientation
Experimenting with different orientations can add variety and interest to your food photography. While a horizontal or landscape orientation is more commonly used for taking pictures of food and can capture the entire table setting or multiple dishes, a vertical or portrait orientation may highlight the height and layers of a towering dessert or a stacked burger. Additionally, consider shooting from different angles, such as directly above the dish or at a 45-degree angle to showcase its depth and texture. Adjusting your camera’s orientation allows you to emphasise different aspects of the food, providing your audience with diverse perspectives and enhancing visual storytelling.
Create a Frame Around Your Food
Incorporating elements that frame your food can enhance its presentation and draw attention to the main subject. This technique adds context to your photographs, guiding the viewer’s eye towards the dish while adding visual interest. You can use props such as cutlery, napkins, or even parts of the table setting to create a natural frame around the plate. However, be mindful of the colours and textures of these elements to complement rather than overwhelm the main dish. Play around with different compositions and arrangements to find the framing that best enhances the aesthetic appeal of your food photos on your travel blog.
Use Negative Space Effectively
Negative space, the empty or blank areas around your subject, can also enhance the visual impact of your food photos. By leaving space around the dish, you create breathing room that draws the eye towards the food and adds a sense of elegance and simplicity to your composition. Moreover, negative space can help balance the overall look of your photograph, preventing it from feeling cluttered or overwhelming.
You don’t necessarily have to be a professional photographer to take beautiful images of the food for your travel blog. By following these tips, you can elevate the quality of your food photos and make your gastronomic adventures more relatable to your audience.
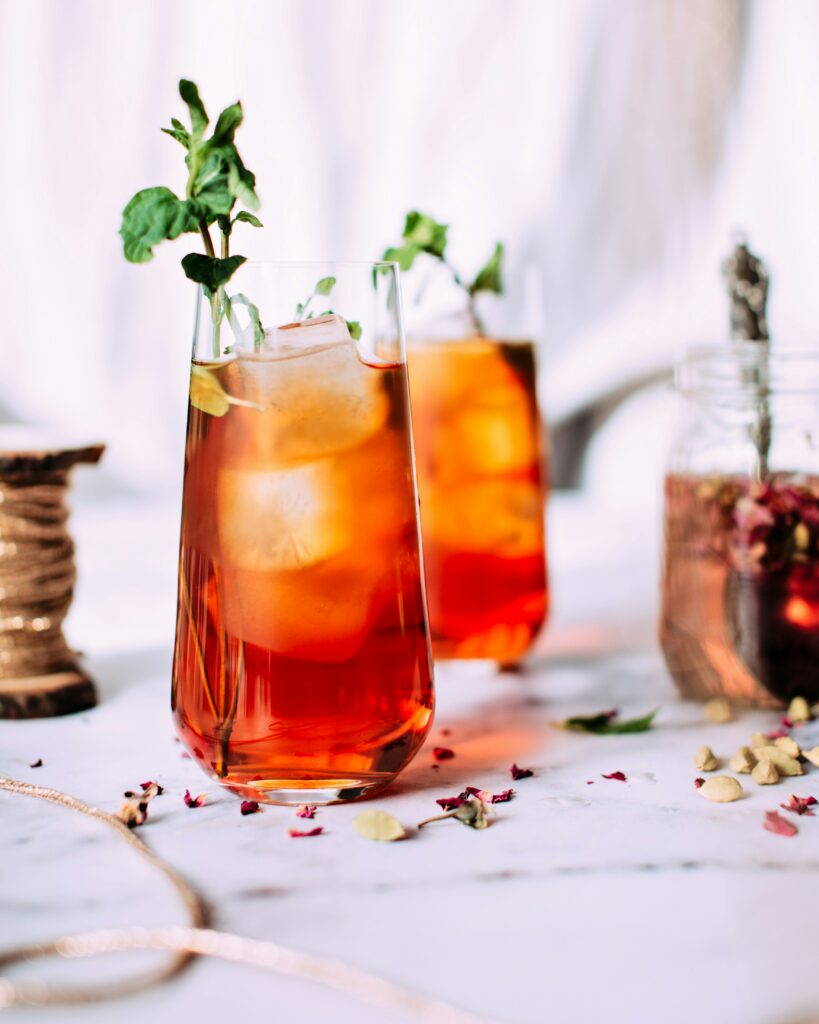
Photo by Food Photographer | Jennifer Pallian on Unsplash






Leave a Reply